

Using the PFE25™ Body Map System
The first time you visit a page in the Body Map System, it may take a bit of time for the images to load depending on your internet connection. After you have visited a page, you will find the images load almost instantly unless you are browsing in private or incognito mode.
To use the PFE25™ Body Map System, simply click on the hotspot closest to the area you wish to address. This intuitive interface eliminates guesswork and delivers the AI-developed protocols that have proven effective across thousands of body locations. Within seconds of clicking your area of concern, you'll have clear, detailed guidance ready to implement.
The images below are not clickable as they are in the actual PFE25™ Body Map System. This page serves as a guide to help you understand how the system functions.
Start with the large overview of the human body shown below. Click the hotspot closest to the area you wish to address. To switch to a back view of the body, simply click the smaller image in the upper left.
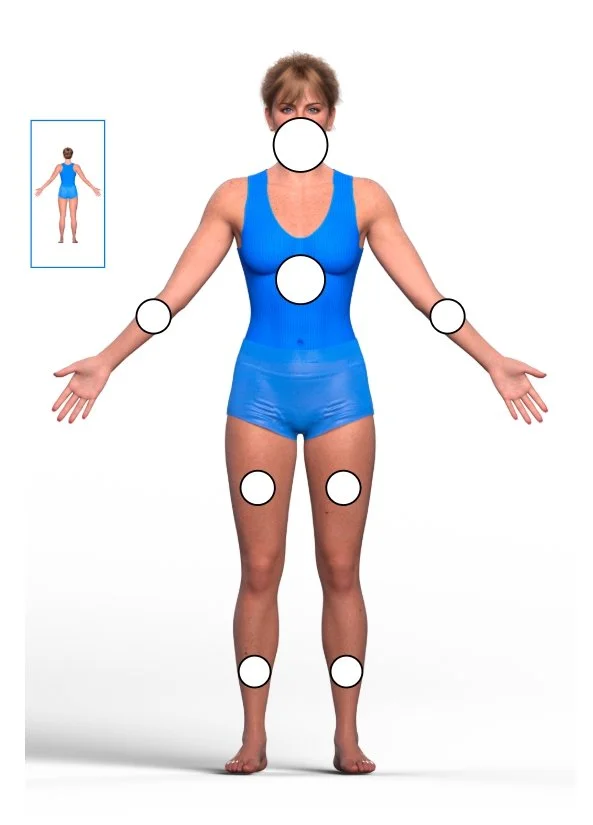
If you clicked on the chest hotspot in the image above, you would be taken to the detailed image of that part of the body (shown below) revealing many more hotspots you can select to access the PFE25™ Placement Protocols for that specific part of the body
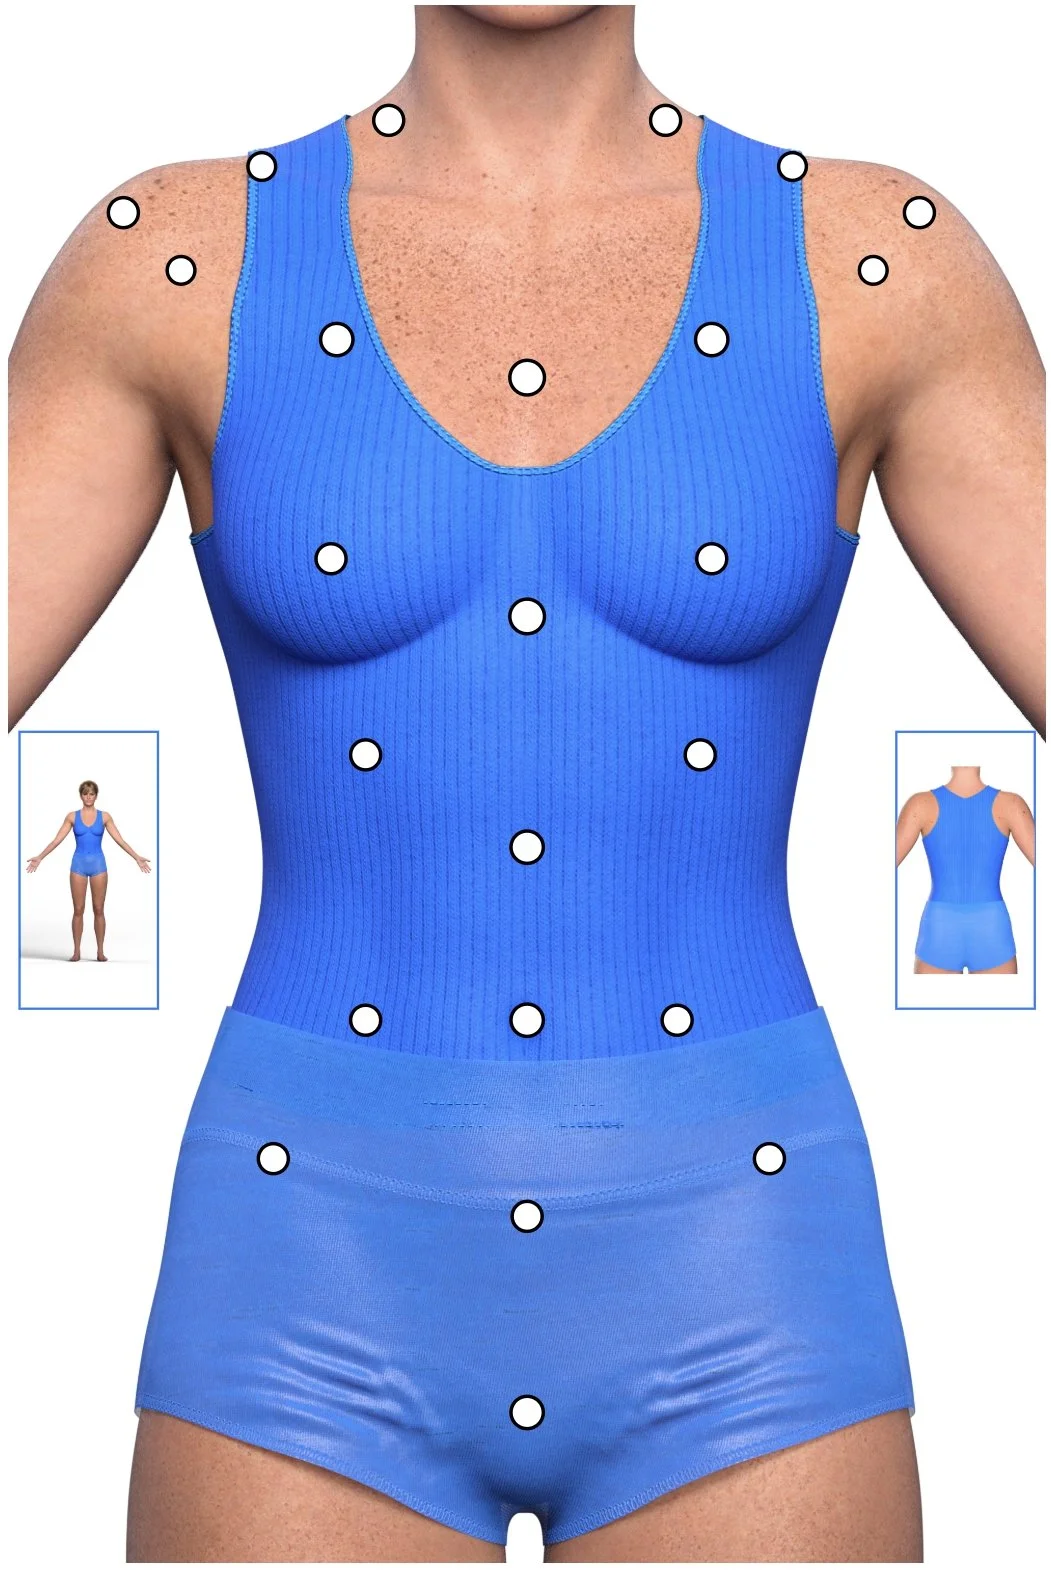
Referring to the image above, you can click on any of the hotspots to be taken to the page containing the placement protocols for that area of the body. To return to the large overview of the full body, simply click the smaller full body image to the left of the torso. To view the back side of the torso, click the small image showing the backside view of the torso.
By now you should be getting the idea. Just click through the Body Map System and it will become clear what each available clickable area does. You cannot break anything, so experiment freely.
Through repeated use of this system, you'll begin to understand how different parts of the body are connected to other parts of the body and, most importantly, how to best use the PFE25™ for optimal effect.
Some hotspots lead to protocol pages that have multiple PFE25™ Placement Protocols for the selected area of the body. Other hotspots currently have only one Placement Protocol for that area. We focused our attention on providing multiple placement protocols for areas of the body most likely to need multiple protocol approaches. You should be able to find a protocol that helps you.
We could provide more instructions here, but honestly the best way to understand the PFE25™ Body Map System is to simply use it repeatedly on different parts of the body. It should become clear what you need to do and where you need to place the PFE25™ arrays to address the issues you wish to target.
The Body Map System is always available at the top of any page on this website by clicking on the Body Menu. If you're on our mobile site, go to the upper right corner and click on the two parallel lines to open the menu system and select the body map you wish to use.